| |
Skinning mini-tutorial 01

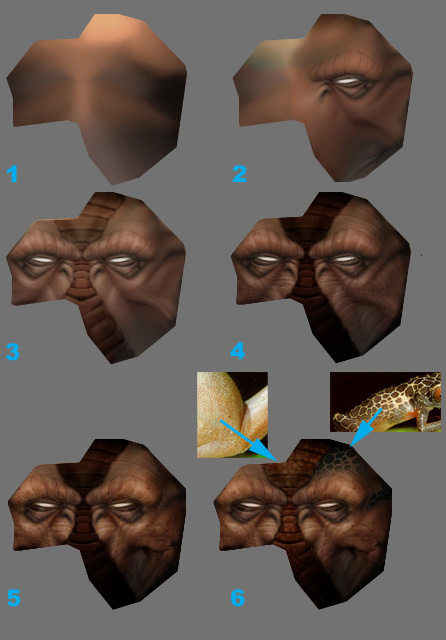
1. I start with a vertex bake of the mesh. I set the colors and lighting in max and bake the vertex colors into the mesh. For a more detailed explanation check out my tutorial on Vertex Baking
2. I begin drawing in the rough detail using the dodge and burn tools.
3. Again more dodge and burn but I made the middle darker and a little redder by playing with the image adjustment tool “Variations”. (In Photoshop look under Image/Adjust/Variations.) I prefer this over the other adjustment tools because it changes the colors as a whole and doesn’t immediately shift to a monochromatic tone.
4. This is the stage I begin getting tighter with the details and using the airbrush, I add additional colors. I also use the smudge tool to blend and smooth out my shading.
5. I go in even tighter, adding in blemishes and finalizing the colors.
6. The last step is texture overlays. I like to find photos and textures that I can overlay over some of my painted detail to create patterning. Place your textures on a new layer above your painted image layer and play with the layer properties to get the effect that best fits. I use Soft Light, Overlay and Multiply the most. I then paint over those to accentuate some of the details. In this example I used photos of a frog and a snail to add some final touches.

|
|


